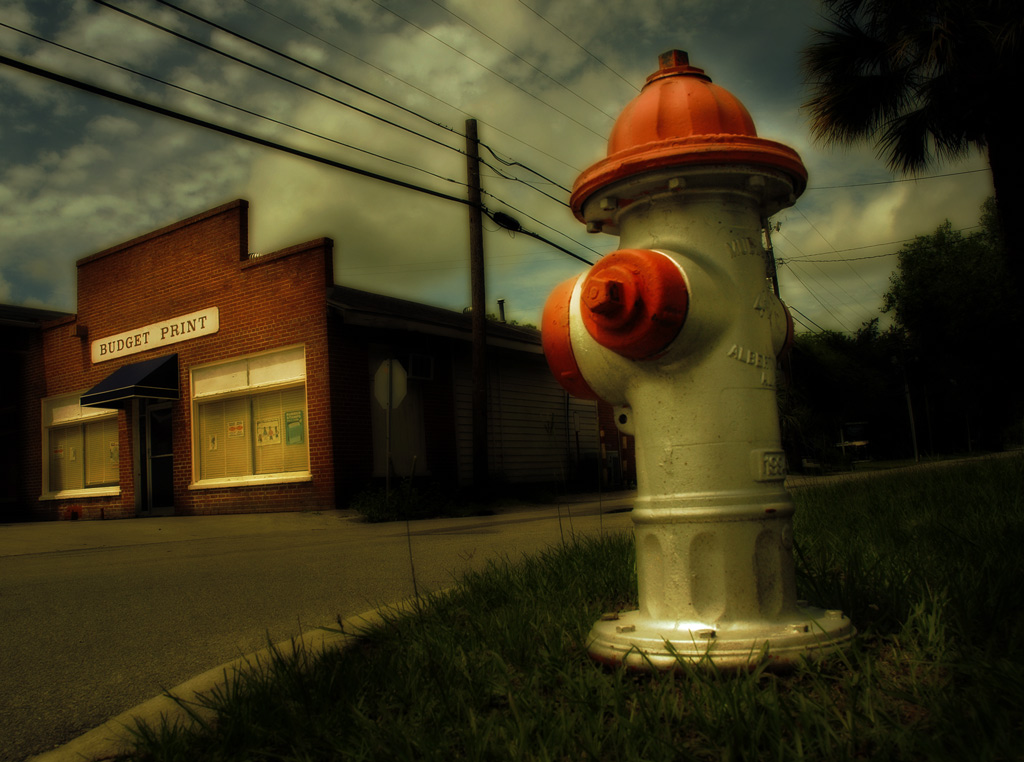
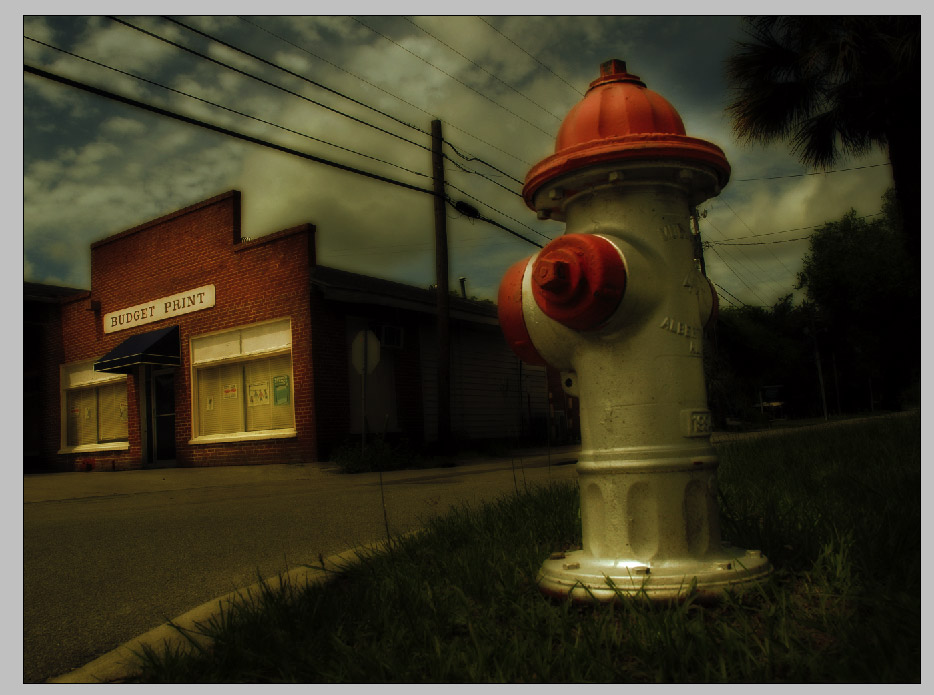
I’ve often been asked about my process for tweaking photos. I thought I’d use one of my favorite photos and show how I took it from initial capture to final public display. I had forgotten how far I had taken this image from its initial capture:
click image to see larger version
I generally don’t like writing Photoshop tutorials, because my assumptions about everything are usually wrong. In this case, I wanted to write a fairly straightforward tutorial, but after showing a draft to Heather, decided to rework it substantially, with more screenshots and better explanations of the steps. This is not a beginner tutorial for Photoshop. This is an advanced tutorial. I hope it doesn’t frustrate you or confuse you.
Some assumptions
—You have access to Photoshop and know your way around some of the palettes. In particular, the Layer Palette. There are several buttons at the bottom of the Layer Palette. There are two that I’ll be making reference to; 1) The New Layer/Duplicate Layer and; 2) the Adjustment Layer button.
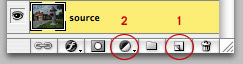
When I mention duplicating layers below, I mean you select the thumbnail/icon of the layer you want to duplicate and drag it to the New Layer button (#1 in the above illustration). This duplicates the layer and positions it above the layer you clicked and dragged.
—You have a photo that you’d like to tweak.
—You aren’t afraid to play around with sliders and settings.
Taking the picture
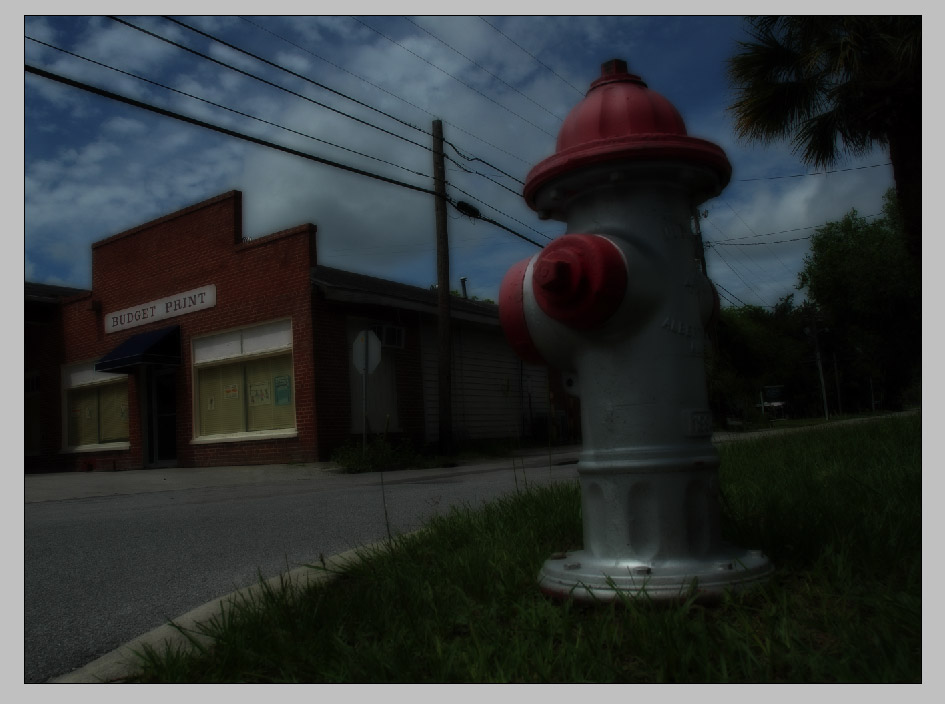
I might muck about with some settings on the camera, but I want to capture the vision in my head as close as I can while I’m in the moment. I might think about post-processing, but that’s pretty rare. I usually make a mental note of the kind of thing I want, click the shot and move on. This isn’t always the best way to work, but it’s how the image I’m using in this tutorial evolved.
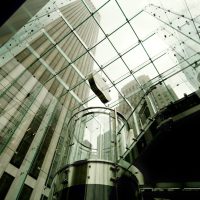
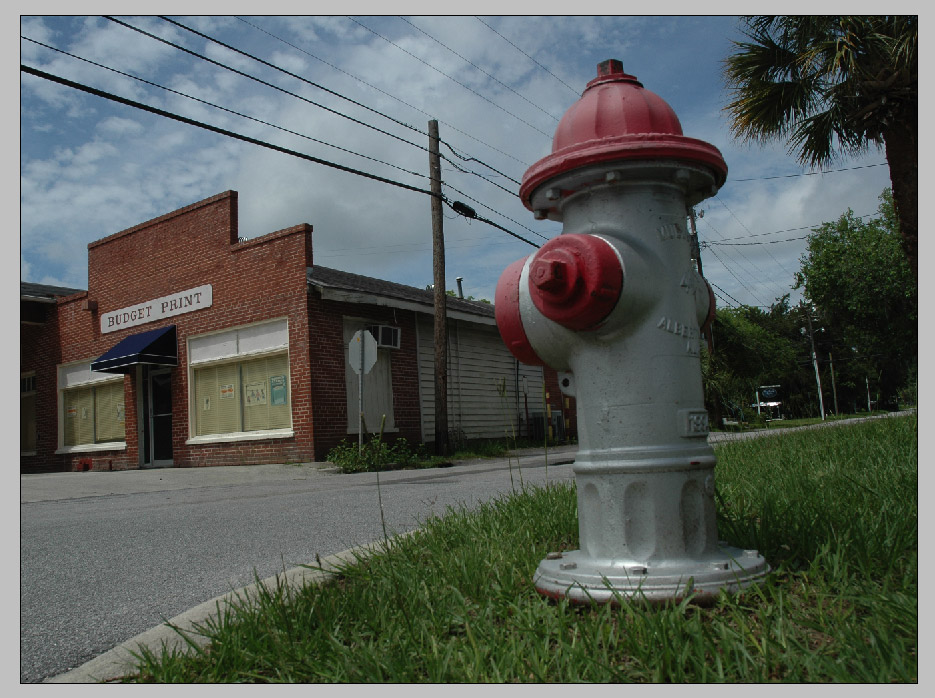
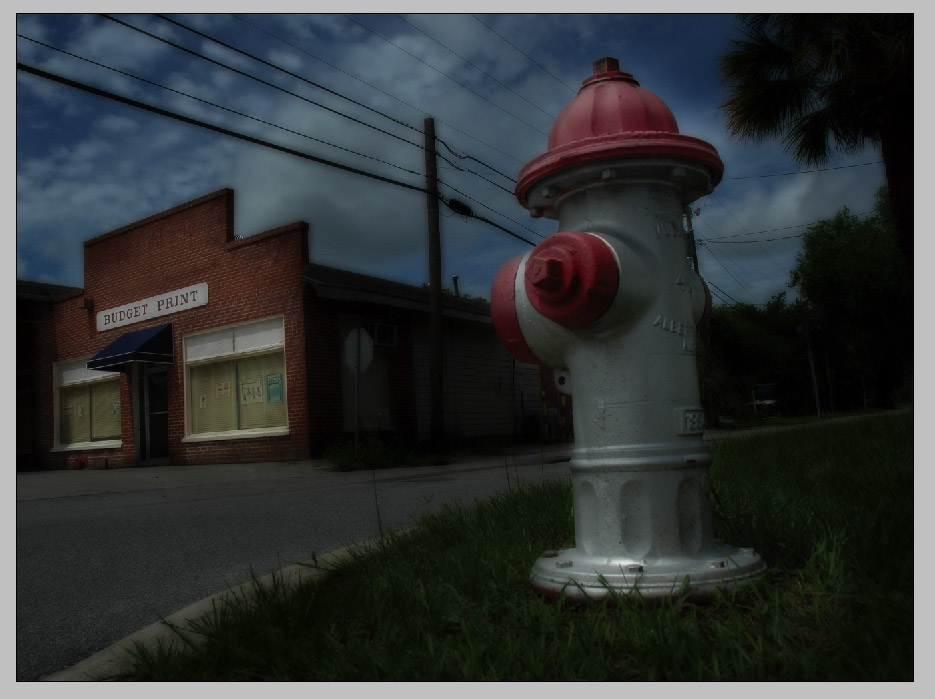
So here’s our starter image:
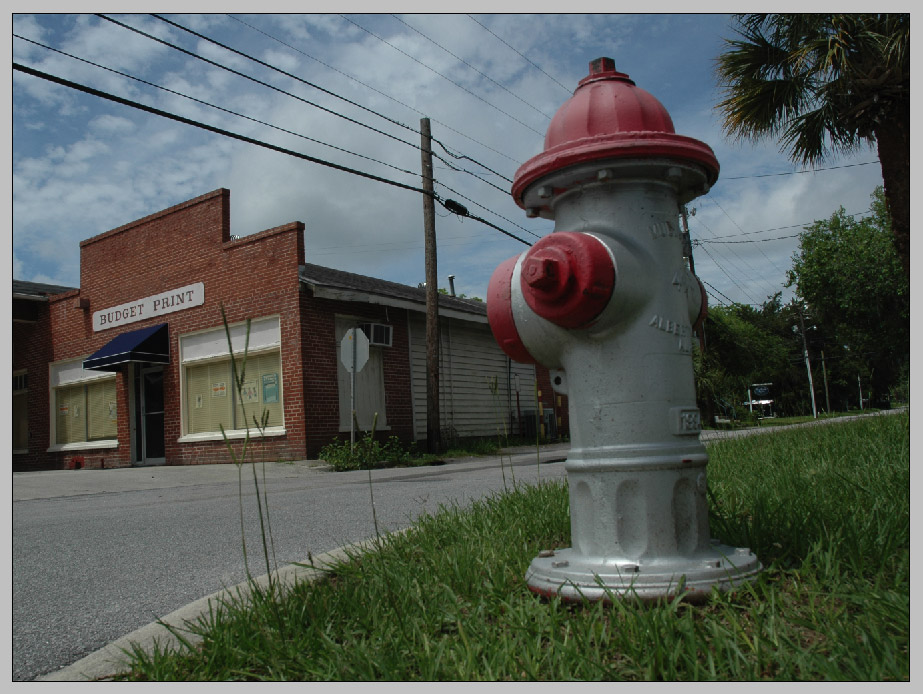
Click image to see larger version
I always keep a layer in Photoshop of my original file, untouched and at the bottom of the stack in the Layer Palette. So the first thing I do is select the background layer and drag it to the New Layer button. This creates a layer of the same image that I can edit, calm in the assurance that if I do anything untoward, I can revert to my original without too much pain. After doing this, the Layers Palette looks like this:
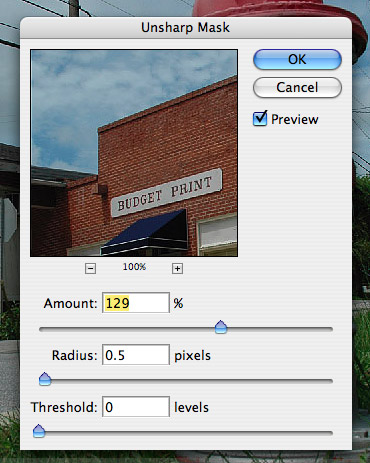
The photo has pretty flat light and not a lot of mood. I love the low angle and of the six shots I took of the building and hydrant, this image shows the most promise by far. That pesky tall grass really is distracting. In my first sharing of this photo, I left it in throughout the processing. Big mistake. It’s out. I’m going to use the stamp tool and get rid of a few strands of tall grass. Since this is optional on whatever you might be working on, I’ll skip all the technique and screenshots, as that would likely be enough information to be its own tutorial. After several hours of painstaking use of the stamp tool it’s time to perform an Unsharp Mask:
This is an entirely subjective thing. Use the three sliders to make your image sharper, without making it look like it came out of a digital camera circa 1997. Which would look like ass. Avoid looking like ass. I use the Amount and Radius settings to get what I want. There are times when the Threshold slider can help, but for speed, it’s all about a .4 to .9 pixel radius and a setting between 80% and 150% on the Amount slider. As with all the steps, the values you might use depend on your image resolution and degree of sharpness you want:
With that, we are here:
Click image to see larger version
Note that because this is a screenshot of a large image, you might not see much difference between the previous image and this one; when you do it yourself, you’ll see a dramatic difference that will change how you look at photos.
Time to Blur
The image is still very flat and there is very little contrast. Let’s take the layer we did the work on and duplicate it by selecting the layer and dragging it to the New Layer button. This will create the third layer in the image on top of the source/Background and the copy of the source we just finished working on. The Layers Palette looks like this:
Apply a Gaussian Blur:
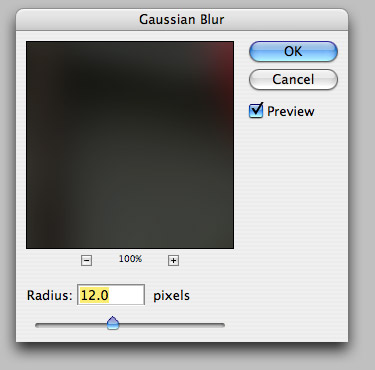
Click image to see a larger version
You’ll want to vary this based on how large your source image is. The larger the image, the higher you can set the blur. Our image now looks like this:
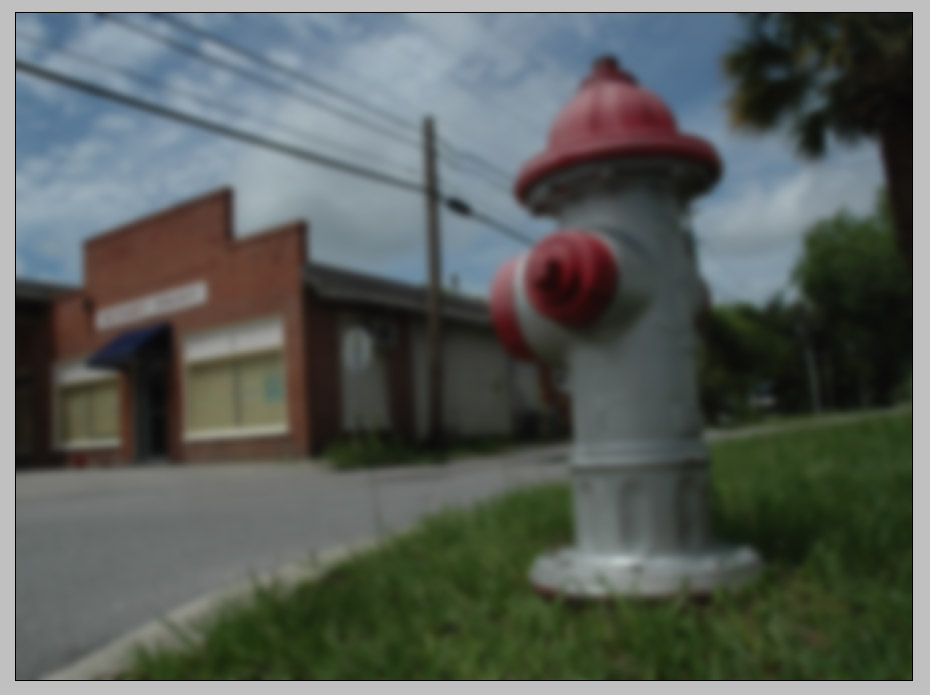
Click the image to see a larger version
Click the image to see a larger version
Click the image to see a larger version

I know. Still a little dark, but we’re building a foundation. Of love:
Click the image to see a larger version
This is where the tutorial will take a turn for the fourth dimension. Masking images can be daunting and takes some time to get used to the concept and how layers can work for us. Think of the layers as a sandwich. The layer we will mask is the cheese layer of the sandwich. We’re going to take that cheese layer and turn it into Swiss cheese. We’ll use the mask to make holes in the image that will allow what is underneath to show through.
This step will rectify the darkness somewhat and is going to require some layer masking and painting on the masked portion of the layer. To do this, we’ll duplicate the blurred layer (the layer I’ve called “blur”) and add a Layer Mask to this new layer, selecting “Reveal All” in the submenu:
Click the image to see a larger version
Your Layer Palette should have a mask icon next to the thumbnail of the image:
I took this shot after I did the work, to show what a Layer mask icon in the Layer Palette looks like. I used the brush tool and selected a basic brush with a blurred fall-off:
Make sure you select the mask icon in the Layer Palette before you start brushing, as you’ll destroy your masterpiece and want to throw things. Important: Masks are painted in grayscale, so I usually paint with black selected as the brush color and use varying flow rates and brush sizes to mask. In this case, I’ve painted black over the building and the hydrant. You’ll notice that it masks out the dark layer we just created and reveals the lighter layer underneath:
Click the image to see a larger version
We’ve started to make the image more dramatic. Now we need to work with Colors, Curves and Levels. We’ll be using Adjustment Layers, which are your best friend when doing work like this. Adjustment layers are non-destructive layers that sit in the palette wherever you’d like and can make playing around a lot less time consuming (reducing the number of Undos). The Adjustment Layer button is at the bottom of the Layers Palette (it’s the half dark/half light one):
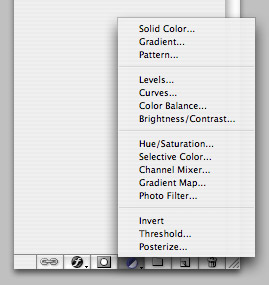
As you can see, there are a ton of options to play with. We’re going to start with Selective Color, as I want to bump up the yellows and reds:
Click the image to see a larger version
We need to add some contrast, and I like using Levels for this, because I can control the blacks, whites and midrange with more precision than just using Brightness/Contrast. We’ll add another Adjustment Layer by clicking on the button in the Layer Palette and selecting “Levels”. This looks just like the regular Photoshop “Levels” command under the image adjustments submenu. Except this is non-destructive and as an Adjustment Layer, holds your settings should you want to tweak them later. After we do the Level adjustments, our Layers Palette looks like this:
Which gives us:

Click the image to see a larger version
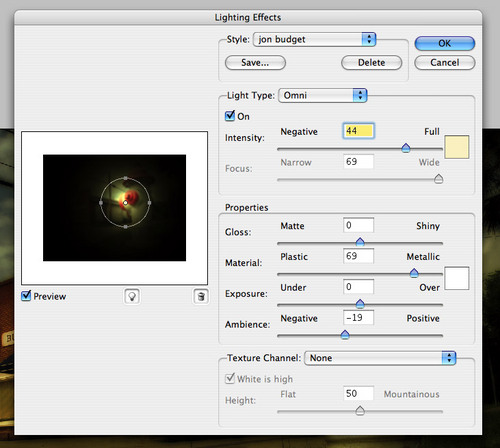
The image is very close to being done. But I want just a tiny bit more light on the hydrant and a hint of a vignette. There are many ways to do this, but at the time I worked on this image, Photoshop didn’t have either Camera Raw or the Lens filters to add vignettes. So I did it using Lighting Effects.
We’ll take the blurred layer that isn’t masked and duplicate it. So we’ll be selecting the layer called “blur”, dragging it to the New Layer/Duplicate Layer button. Once the layer is created, we’ll drag it in the Layer Palette so that it is at the top of the palette, above the two adjustment layers we just made. Our Layers Palette looks like this:
Then we’ll select this layer and do the Lighting Effects:
I used these settings in the Lighting Effects panel:
Set the transparency on this layer to Overlay and the Opacity to 33%:
We are almost there. It still needs just a touch of lightening overall, and I like to use Curves to accomplish this. We’ll make a new Adjustment Layer by clicking the icon in the Layers Palette and selecting “Curves”. A simple adjustment lightens up the image enough to recapture some of our highlights. Our Layer Palette looks like this:
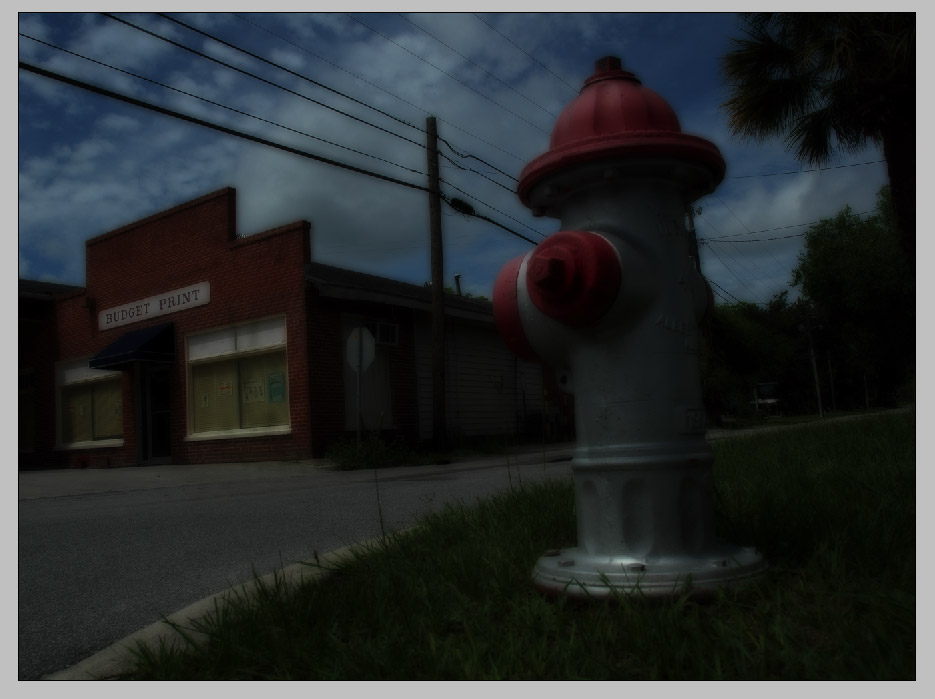
click image to see larger version
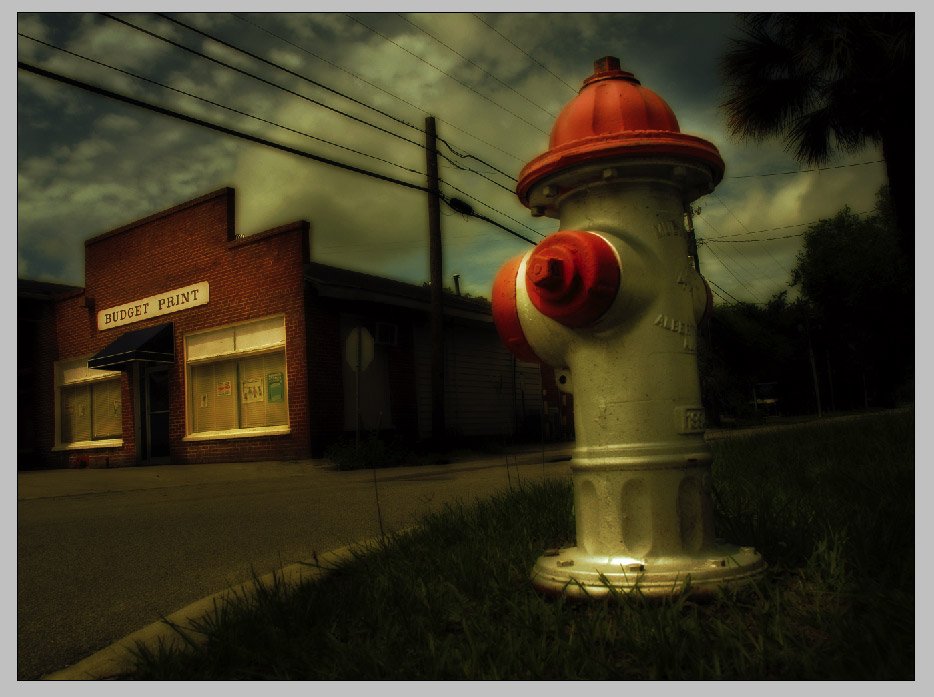
And boom. We’re there. This concludes the Photoshop tutorial.
Also published on Medium.